TypeScript, Node.js & Express: Tạo API CRUD Cơ Bản (P2)

Chào anh em, ở phần trước, chúng ta đã cùng nhau xây dựng cấu trúc thư mục cũng như cài đặt các thư viện cơ bản của một dự án Express Typescript. Ở phần 2 này, chúng ta sẽ đi sâu vào phần tạo dựng và tương tác với API nhé.
Dành cho anh em nào chưa xem qua phần 1: TypeScript, Node.js & Express: Xây dựng nền tảng dự án (P1)
API CRUD Cơ Bản
Để minh họa cách mọi thứ hoạt động, chúng ta sẽ cùng nhau xây dựng một API CRUD cơ bản cho “items”.
Cấu hình môi trường .env
Đầu tiên, anh em tạo một file .env ở thư mục gốc của project và thêm vào đó một biến môi trường, ví dụ:
PORT=3000Sau đó, trong file src/config/config.ts, anh em có thể load các biến môi trường này và định nghĩa một interface để “type” chúng:
import dotenv from 'dotenv';
dotenv.config();

interface Config {
  port: number;
}

const config: Config = {
  port: Number(process.env.PORT) || 3000,
};

export default config;Tạo Model (src/models/item.ts)
Trong file src/models/item.ts, chúng ta sẽ định nghĩa interface cho Item và tạo một nơi chứa dữ liệu tạm thời (in-memory array) để demo:
export interface Item {
    id: number;
    name: string;
  }

  const items: Item [] = [];
  let nextId = 1;

  export const addItem = (name: string): Item => {
    const newItem: Item = { id: nextId++, name };
    items.push(newItem);
    return newItem;
  };

  export const getItemById = (id: number): Item | undefined => items.find(item => item.id === id);

  export const getAllItems = (): Item[] => items;
  export const updateItem = (id: number, name: string): Item | undefined => {
    const index = items.findIndex(item => item.id === id);
    if (index!== -1) {
      items[index].name = name;
      return items[index];
    }
    return undefined;
  };

  export const deleteItem = (id: number): boolean => {
    const index = items.findIndex(item => item.id === id);
    if (index!== -1) {
      items.splice(index, 1);
      return true;
    }
    return false;
};“Xử lý” Controller (src/controllers/itemController.ts)
Trong file src/controllers/itemController.ts, chúng ta sẽ implement các function để xử lý các request liên quan đến items:
import { Request, Response } from 'express';
import { Item, addItem, getItemById, getAllItems, updateItem, deleteItem } from '../models/item';

export const createItem = (req: Request, res: Response) => {
  const { name } = req.body;
  if (!name) {
    return res.status(400).json({ message: 'Name is required' });
  }
  const newItem = addItem(name);
  res.status(201).json(newItem);
};

export const getItem = (req: Request, res: Response) => {
  const id = Number(req.params.id);
  const item = getItemById(id);
  if (!item) {
    return res.status(404).json({ message: 'Item not found' });
  }
  res.json(item);
};

export const getItems = (req: Request, res: Response) => {
  const items = getAllItems();
  res.json(items);
};

export const updateExistingItem = (req: Request, res: Response) => {
  const id = Number(req.params.id);
  const { name } = req.body;
  const updatedItem = updateItem(id, name);
  if (!updatedItem) {
    return res.status(404).json({ message: 'Item not found' });
  }
  res.json(updatedItem);
};

export const deleteExistingItem = (req: Request, res: Response) => {
  const id = Number(req.params.id);
  const isDeleted = deleteItem(id);
  if (!isDeleted) {
    return res.status(404).json({ message: 'Item not found' });
  }
  res.status(204).send();
};Xây dựng API (src/routes/itemRoutes.ts)
Trong file src/routes/itemRoutes.ts, chúng ta sẽ định nghĩa các route API cho items:
import express from 'express';
import { createItem, getItem, getItems, updateExistingItem, deleteExistingItem } from '../controllers/itemController';

const router = express.Router();

router.post('/items', createItem);
router.get('/items/:id', getItem);
router.get('/items', getItems);
router.put('/items/:id', updateExistingItem);
router.delete('/items/:id', deleteExistingItem);

export default router;“Bắt lỗi” toàn cục (src/middlewares/errorHandler.ts)
Trong file src/middlewares/errorHandler.ts, chúng ta có thể tạo một middleware đơn giản để “bắt lỗi” và trả về response theo một format thống nhất:
import { Request, Response, NextFunction } from 'express';

export const errorHandler = (err: Error, req: Request, res: Response, next: NextFunction) => {
  console.error(err.stack);
  res.status(500).json({ message: 'Something went wrong!' });
};Triển khai App (src/app.ts)
Trong file src/app.ts, chúng ta sẽ “lắp ráp” ứng dụng Express bằng cách import các module cần thiết, sử dụng middleware và mount các routes:
import express from 'express';
import itemRoutes from './routes/itemRoutes';
import { errorHandler } from './middlewares/errorHandler';

const app = express();

app.use(express.json());
app.use('/api', itemRoutes);
app.use(errorHandler);

export default app;Khởi động” Server (src/server.ts)
Cuối cùng, trong file src/server.ts, chúng ta sẽ “khởi động” server Express:
import app from './app';
import config from './config/config';

const port = config.port;

app.listen(port, () => {
  console.log(`Server is running on port ${port}`);
});Bổ sung script (package.json)
"scripts": {
  "build": "tsc",
  "start": "node dist/server.js",
  "dev": "nodemon src/server.ts",
}Trong phần scripts của file package.json, chúng ta đã thêm một vài script để giúp quá trình phát triển trở nên dễ dàng hơn:
build: Script này sẽ chạy TypeScript compiler (tsc) để biên dịch code TypeScript sang JavaScript và đặt vào thư mụcdist/.start: Script này sẽ chạy server JavaScript đã được biên dịch từ thư mụcdist/bằng lệnhnode dist/server.js. Script này thường được sử dụng khi deploy ứng dụng lên production.dev: Script này sử dụngnodemonđể theo dõi các thay đổi trong các file TypeScript ở thư mụcsrc/. Mỗi khi có thay đổi,nodemonsẽ tự động restart server. Chúng ta sử dụngts-nodeđể chạy trực tiếp các file TypeScript mà không cần phải biên dịch trước, rất tiện lợi trong quá trình phát triển.
Ngoài ra, anh em cũng có thể sử dụng lệnh tsc --watch trong một terminal khác để TypeScript compiler tự động biên dịch lại code mỗi khi có thay đổi.
Vậy là xong, chúng ta đã hoàn thành xây dựng được một API CURD cơ bản tương tác ới Items. Bây giờ hãy cùng khởi chạy thử nhé.
Khởi chạy dự án
Để chạy server trong quá trình phát triển, anh em chỉ cần chạy lệnh sau trong terminal:
npm run devNếu mọi thứ cấu hình đúng, anh em sẽ thấy log Server is running on port 3000 (hoặc port mà anh em đã cấu hình).
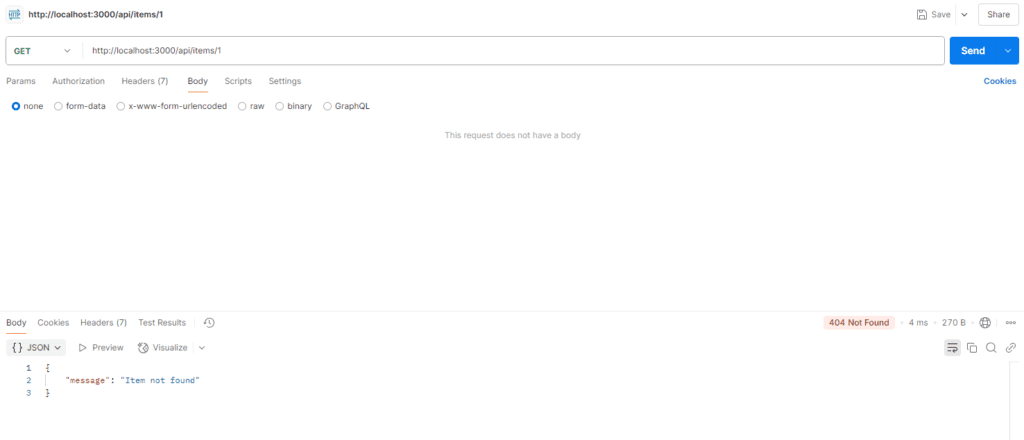
Bây giờ, anh em có thể sử dụng các công cụ như curl hoặc Postman để test các API endpoints đã tạo:
Tạo item (POST):
curl -X POST -H "Content-Type: application/json" -d '{"name": "My new item"}' http://localhost:3000/api/items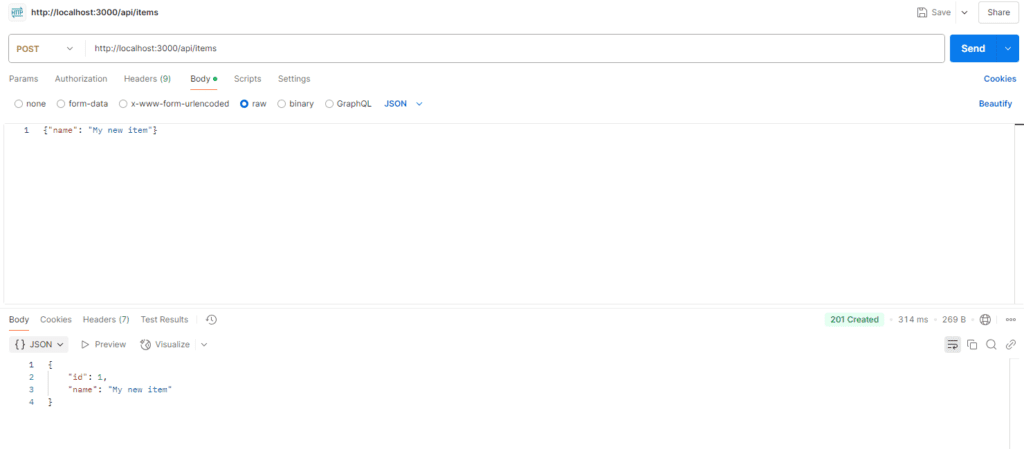
Lấy tất cả items (GET):
curl http://localhost:3000/api/items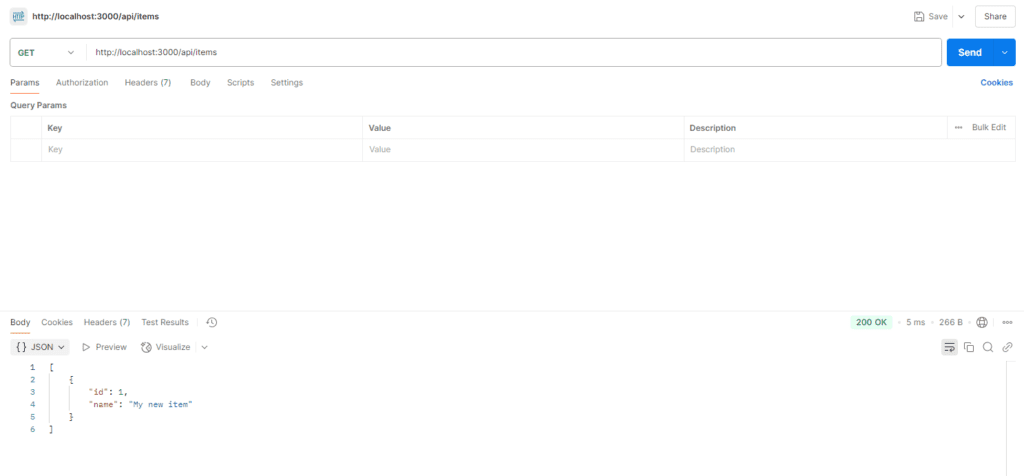
Lấy một item theo ID (GET):
curl http://localhost:3000/api/items/1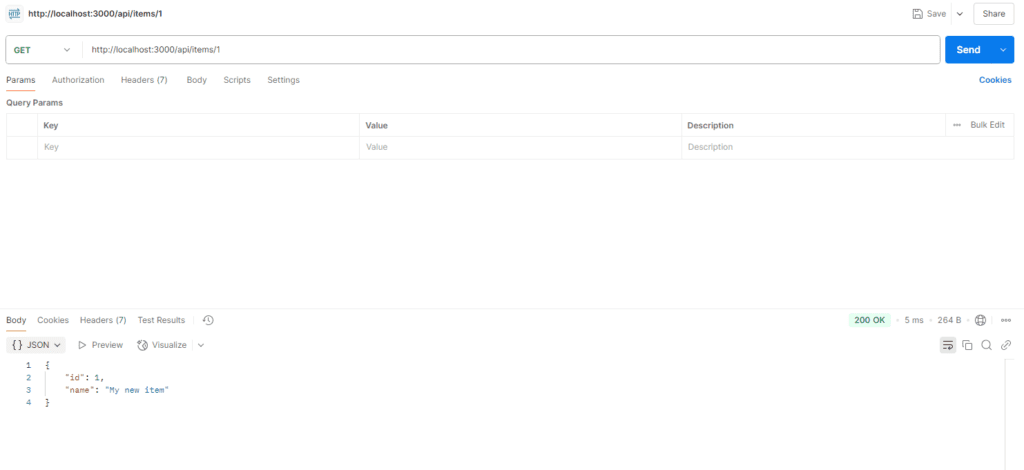
Cập nhật một item (PUT):
curl -X PUT -H "Content-Type: application/json" -d '{"name": "Updated item name"}' http://localhost:3000/api/items/1Xóa một item (DELETE):
curl -X DELETE http://localhost:3000/api/items/1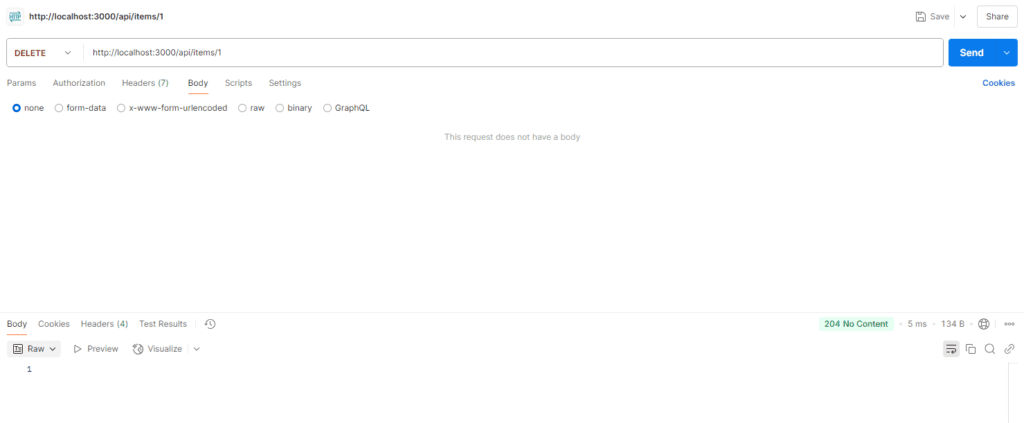
Testing – “Thử Lửa” với Jest
Để đảm bảo code của anh em hoạt động đúng như mong đợi, việc viết unit test là vô cùng quan trọng. Chúng ta sẽ sử dụng Jest, một framework testing rất phổ biến trong cộng đồng JavaScript.
Đầu tiên, anh em cài đặt Jest và các dependencies cần thiết:
npm install --save-dev jest ts-jest @types/jestTiếp theo, anh em tạo một file jest.config.js ở thư mục gốc của project với nội dung sau để cấu hình Jest cho việc làm việc với TypeScript:
module.exports = {
  preset: 'ts-jest',
  testEnvironment: 'node',
  testMatch: ['<rootDir>/src/**/*.test.ts'],
};Chúng ta thường tổ chức các file test trong một thư mục tests/ hoặc cùng cấp với các file source code và có đuôi là .test.ts. Ví dụ, chúng ta có thể tạo một file src/controllers/itemController.test.ts với một test case đơn giản cho function getItems:
import { Request, Response } from 'express';
import { getItems } from './itemController';
import { getAllItems } from '../models/item';

jest.mock('../models/item');

describe('getItems', () => {
  it('should return all items', () => {
    const mockItems = [{ id: 1, name: 'Item 1' }, { id: 2, name: 'Item 2' }];
    (getAllItems as jest.Mock).mockReturnValue(mockItems);

    const mockReq = {} as Request;
    const mockRes = {
      json: jest.fn(),
    } as unknown as Response;

    getItems(mockReq, mockRes);

    expect(mockRes.json).toHaveBeenCalledWith(mockItems);
  });
});Cuối cùng, anh em thêm các script test và test:watch vào phần scripts trong file package.json:
"scripts": {
    "build": "tsc",
    "start": "node dist/server.js",
    "dev": "nodemon src/server.ts",
    "test": "jest",
    "test:watch": "jest --watchAll"
},Bây giờ, anh em có thể chạy các test bằng lệnh npm test hoặc npm run test:watch để chạy test ở chế độ theo dõi (mỗi khi có thay đổi trong code, test sẽ tự động chạy lại).

Triển Khai với Docker
Để việc triển khai ứng dụng trở nên dễ dàng và nhất quán trên mọi môi trường, chúng ta có thể sử dụng Docker.
Đầu tiên, anh em tạo một file Dockerfile ở thư mục gốc của project với nội dung sau:
FROM node:18-alpine

WORKDIR /app

COPY package*.json ./

RUN npm install --production

COPY . .

RUN npm run build

EXPOSE 3000

CMD ["node", "dist/server.js"]File này mô tả các bước để xây dựng một Docker image cho ứng dụng của anh em:
FROM node:18-alpine: Sử dụng một image Node.js phiên bản 18 dựa trên Alpine Linux, một bản phân phối Linux rất nhỏ gọn.WORKDIR /app: Tạo một thư mục/appbên trong container và đặt nó làm thư mục làm việc hiện tại.COPY package*.json./: Copy các filepackage.jsonvàpackage-lock.json(nếu có) vào thư mục/app.RUN npm install --production: Chạy lệnhnpm install --productionđể cài đặt các dependencies cần thiết cho production. Option--productionsẽ bỏ qua cácdevDependencies.COPY..: Copy toàn bộ source code của project vào thư mục/app.RUN npm run build: Chạy scriptbuildđể biên dịch code TypeScript sang JavaScript.EXPOSE 3000: Khai báo rằng ứng dụng sẽ lắng nghe trên port 3000 bên trong container.CMD ["node", "dist/server.js"]: Đây là lệnh sẽ được chạy khi container được khởi động, nó sẽ chạy file server JavaScript đã được biên dịch.
Tiếp theo, anh em tạo một file .dockerignore ở thư mục gốc của project để chỉ định các file và thư mục không cần thiết phải đưa vào Docker image, giúp giảm kích thước image và thời gian build:
node_modules
dist
.env
.git
.gitignoreCuối cùng, anh em có thể build Docker image và chạy container bằng các lệnh sau:
docker build -t ts-express-app.
docker run -p 3000:3000 ts-express-appLệnh docker build -t ts-express-app. sẽ build một image với tên ts-express-app từ file Dockerfile trong thư mục hiện tại (.). Lệnh docker run -p 3000:3000 ts-express-app sẽ chạy một container từ image ts-express-app và map port 3000 của container với port 3000 của máy chủ.
Clean code với ESLint và Prettier
Để đảm bảo code của anh em luôn sạch đẹp và tuân theo một chuẩn nhất định, chúng ta sẽ cấu hình ESLint và Prettier.
Anh em tạo file .eslintrc.js với nội dung sau:
module.exports = {
  env: {
    node: true,
    es2021: true,
  },
  extends: [
    'eslint:recommended',
    'plugin:@typescript-eslint/recommended',
    'prettier',
  ],
  parser: '@typescript-eslint/parser',
  plugins: [
    '@typescript-eslint',
    'prettier',
  ],
  rules: {
    'prettier/prettier': 'warn',
    '@typescript-eslint/explicit-function-return-type': 'off',
  },
};Và tạo file .prettierrc với nội dung sau:
{
  "semi": false,
  "trailingComma": "es5",
  "singleQuote": true,
  "printWidth": 100
}Sau đó, anh em có thể thêm các script vào phần scripts trong file package.json để chạy ESLint và Prettier:
"scripts": {
  ..
  "lint": "eslint src/**/*.ts",
  "format": "prettier --write src/**/*.ts"
}Trong đó:
lint: Script này sẽ chạy ESLint trên tất cả các file TypeScript trong thư mụcsrc/để kiểm tra code style và các lỗi tiềm ẩn.format: Script này sử dụng Prettier để tự động format code cho đẹp và đồng nhất.
Biên Dịch TypeScript: Từ .ts sang .js
Như anh em đã thấy, TypeScript compiler (tsc) đóng vai trò quan trọng trong việc chuyển đổi code TypeScript (.ts) sang code JavaScript (.js) mà Node.js có thể hiểu và thực thi. Khi anh em chạy lệnh npm run build, script này sẽ gọi tsc, và tsc sẽ đọc cấu hình từ file tsconfig.json để biết cách biên dịch các file TypeScript trong thư mục src/ và đặt kết quả vào thư mục outDir (thường là dist/). Chính các file JavaScript trong thư mục dist/ sẽ được sử dụng khi anh em chạy ứng dụng ở môi trường production.
Để tối ưu hóa quá trình build cho production, anh em có thể cân nhắc việc bật chế độ strict trong tsconfig.json để đảm bảo code chất lượng cao hơn. Ngoài ra, anh em cũng có thể tìm hiểu về các công cụ build mạnh mẽ hơn như webpack để thực hiện các tác vụ phức tạp hơn như code splitting và giảm dung lượng file.
Lời Kết
Vậy là anh em đã cùng nhau đi qua các bước cơ bản để setup một project Node.js và Express với TypeScript. Chúng ta đã cùng nhau khởi tạo project, cài đặt các dependencies cần thiết, cấu hình TypeScript, xây dựng một API CRUD đơn giản, thiết lập linting và formatting, viết unit test và thậm chí là container hóa ứng dụng với Docker.
Mặc dù có thể có một chút khó nhằn ban đầu khi làm quen với TypeScript, nhưng những lợi ích mà nó mang lại cho dự án của anh em là hoàn toàn xứng đáng. Code sẽ trở nên an toàn hơn, dễ bảo trì hơn và làm việc nhóm cũng hiệu quả hơn. Hy vọng bài viết này sẽ là một “kim chỉ nam” hữu ích cho anh em trên con đường chinh phục TypeScript.
Cảm ơn anh em đã dành thời gian đọc bài viết. Hẹn gặp lại anh em trong các bài viết tiếp theo.
Tôi là SiuCode – Vừa code vừa siuuuu🚀


